Here's what you need:
Next, Soak the seed: If you have chosen to sprout in a jar you can soak the seed in the same jar. If not, any sterile container will do. Use about one cup of water to every tablespoon of seed.
Soak Times:
Remember, these are ideal soak times but if in doubt soak less rather than more. If you do over soak, just carry on. Sprouts are very forgiving!
Rinse and drain 2 or 3 times each day with fresh cold water and invert the jar on angle to allow excess water to drain.
And lastly. . . Enjoy!
Place the finished sprouts in as sink of cold water and swirl to separate the hulls. The hulls are fine to eat but your sprouts will look much better without! Remove sprouts by the handful, rinsing under the tap. Most hulls should be left in the sink. Drain the sprouts and allow to dry for a few hours before storing in fridge.
How To Sprout Microgreens:
or
Dampen medium
Dampen the grow medium and place in tray.
Soak the seed
Soaking the seed accelerates the germination process.
Generally, the larger the seed the longer the soak time.
Peas and sunflowers can be soaked overnight. Many growers soak larger seed in a 5 gallon bucket covered with mesh secured with bungee cord or tourniquet and drain, tilting the bucket at an angle so excess water can drain out. They then allow the seeds to sprout for 1-2 days or until a small tail appears. Rinse and drain twice a day. This is generally done to save space so fewer trays are in use at a given time.
Smaller seed will absorb water through the hull in 2-4 hours
Seeds from the brassica family can drown if oversoaked, so generally shouldn’t be soaked for more than 2 hours.
Gelatinous and very tiny seed shouldn’t be soaked
Sow the Seed
Sprinkle the seed evenly over the entire tray. The seeding density depends on the stage at which you’re planning to harvest. Sow the seed quite thickly (one thin layer with the seeds touching one another) for small 1 week microgreens; leave a bit more space between the seeds for 2-3 week microgreens.
Mixes: As we know, diversity is important in any agricultural system, including a microgreen operation. We’ve found over the years that sprouts and microgreens will generally grow better when mixed with other seeds. Creating your own mix is a great idea. Just be mindful of only mixing seeds that can be harvested at approximately the same time.
Press seeds
Lightly press the seeds into the soil.
Cover the Seed
Traditionally, seed would be covered with soil, but this leads to a longer harvesting process, and it takes time to rinse the soil from the small leaves and stems. I prefer covering the seed with a layer of unbleached paper towel. Another advantage of the paper towel cover is that it stays moist longer than a soil cover. This is a great addition to your compost. If using cloth towels, be sure to sterilize between uses.
Water
Give the seeds a generous amount of water, using a spray bottle or a garden spray nozzle set to light/medium. Don’t worry about overwatering during this initial watering, since the soil will absorb much of the water. Underwatering can cause the seed to dry out and the germination process to stop.
Stack or Cover with Lids
At this stage, some growers choose to stack the trays to allow the roots to set deeply into the soil. If you choose to stack the trays, you may want to put an empty tray on the very top of the stack and put a light weight on top. The trays typically remain stacked for 2-3 days. Check twice a day to see if the trays need water. (The soil should be moist, not wet.) After 2-3 days, cover with lids (see below).
If choosing not to stack, simply cover the trays with clear plastic or dome lids. Check the trays twice daily and water if necessary.
Water the Germinating Seed
Check the seed twice daily and water as needed. The soil should be moist, not wet. After 2-3 days the paper towel will start to lift off the seed. This is an indication that the microgreens are ready to be exposed to indirect sunlight.
Expose to Indirect Sunlight
During the initial germination process (the first 2-3 days) the sprouts don’t require light. After 2-3 days, the microgreens should be ready for indirect sunlight. Be careful not to expose the plants to direct, hot sunlight as this can damage the delicate microgreens. Another option is to use florescent or grow lights. If the microgreens begin to get quite tall and leggy, this is an indication that they may need a bit more light.
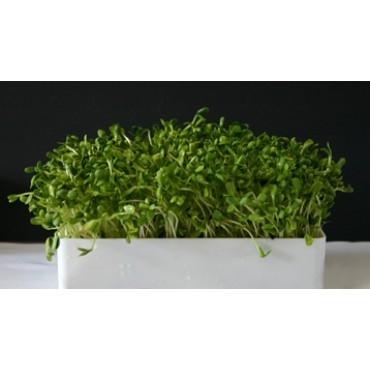
Harvest!
Typically, microgreens are harvested at 1-3 weeks. Scissors are a very effective tool for harvesting microgreens. Wash and dry well. A small fan is an effective means of drying.